
I was asked a question recently, on how you would solve signing an XML file in an Azure Web App, over Twitter:
https://twitter.com/itproDHO/status/635475665760985090
The answer, as it turns out, is farily simple. It just involves a couple steps, so I wanted to write it down in this blog post in the hopes that it may someday help someone else.
Step 1: Generating the Certificate
Obviously, this is only needed if you are working with a self-signed certificate - which I am, for the purpose of this proof of concept. To generate it, launch Developer Command prompt for Visual Studio. Next, type in these commands:
[ecko_code_highlight language="shell"]makecert -n "CN=Anze Vodovnik s.p. Test CA" -cy authority -a sha1 -sv AV-ca.pvk -r AV-ca.cer[/ecko_code_highlight]
[ecko_code_highlight language="shell"]pvk2pfx -pvk AV-ca.pvk -spc AV-ca.cer -pfx AV-ca.pfx -po <your password for the certificate>[/ecko_code_highlight]
Refer to this awesome post: http://www.digitallycreated.net/Blog/38/using-makecert-to-create-certificates-for-development for more information on what this actually does. For us, all we need to know right now is that it generates the PFX file we are going to upload.
Step 2: Upload the PFX file to our Azure Web App
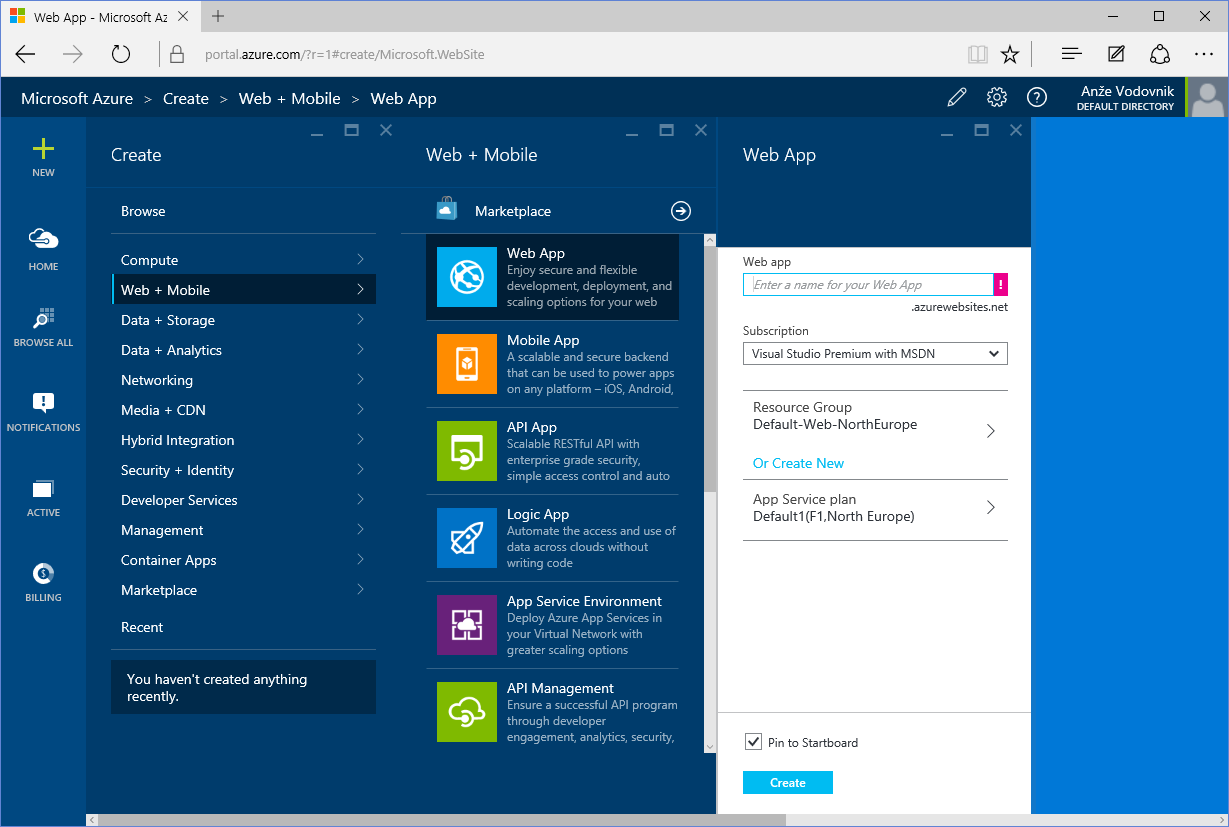
We start by creating the Web App.
Once that's done, we open the settings for this Web App, open Custom Domains and SSL and then select Upload Certificate.
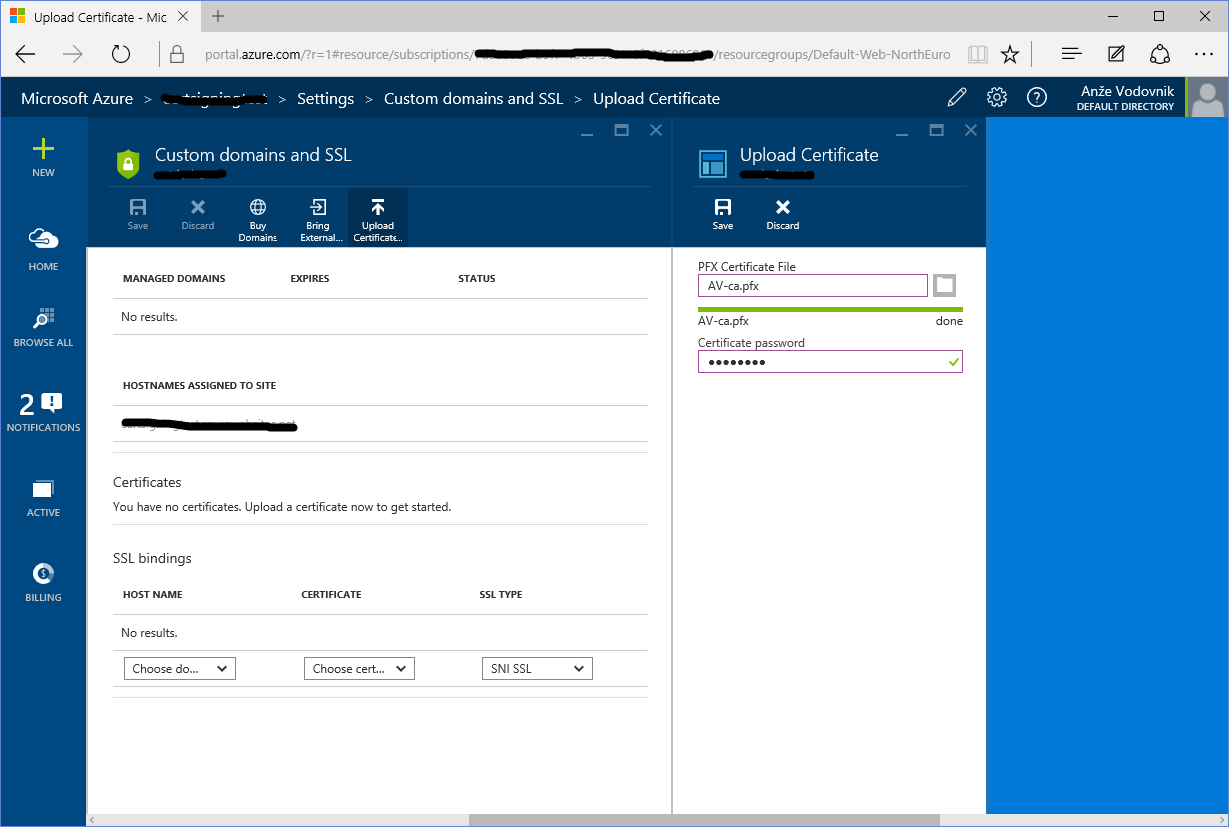
We now select our PFX file and enter the password we entered above. Once it's done, you should see it in the Certificates area:
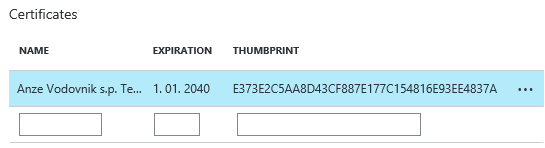
Thanks to this answer, we also know that we need to add an Application Setting, so open the Application Settings, scroll down to the area called App Settings, and add WEBSITE_LOAD_CERTIFICATES. The value needs to be set to the thumbprint we copied earlier. Please note that this can be a comma separated list for multiple certificates, if you need that. You can also use a wildcard (*****) to load all your uploaded certificates.
Step 3: Accessing the Certificate from our App
To Access the certificate, the steps are fairly straight-forward. Once you know the above trick (the App Setting).
var store = new X509Store(StoreName.My, StoreLocation.CurrentUser);


store.Open(OpenFlags.ReadOnly);


X509Certificate2Collection matchedCertificates =
    store.Certificates.Find(X509FindType.FindByThumbprint,
                            "E373E2C5AA8D43CF887E177C154816E93EE4837A", false);


// we assume there's only one, obviously you need to be more careful...
var cert = matchedCertificates[0];


// store the private key for later (signing)
var rsaCsp = (RSACryptoServiceProvider)cert.PrivateKey;
Note: the last argument in the Find call tells us if we should limit ourselves to valid certificates only (true), which won't work for self-signed ones, obviously. However, setting this to false might also mean that you can load a certificate that is not valid anymore. Keep that in mind.
Step 4: Signing the XML Document
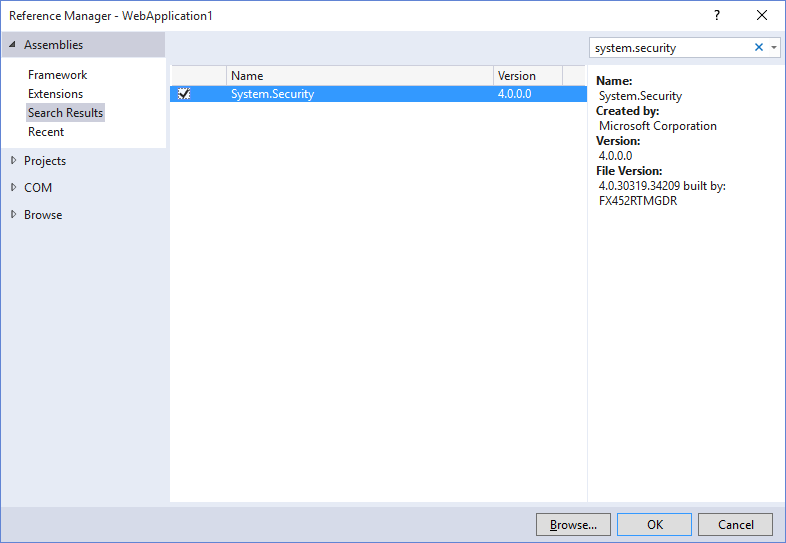
MSDN has us covered for this one. One trick, you need to reference System.Security.
// let's create a dummy XML doc
 var xmlDoc = new XmlDocument()
 {
 PreserveWhitespace = true
 };


xmlDoc.Load(Server.MapPath("~/test.xml"));


// actually sign
 var signedDoc = new SignedXml(xmlDoc);
 signedDoc.SigningKey = rsaCsp;


// Create a reference to be signed.
 Reference reference = new Reference();
 reference.Uri = ""; // we're signing the entire document


var env = new XmlDsigEnvelopedSignatureTransform();
 reference.AddTransform(env);


signedDoc.AddReference(reference);


// the magic
 signedDoc.ComputeSignature();


var xmlDigitalSignature = signedDoc.GetXml();
 xmlDoc.DocumentElement.AppendChild(xmlDoc.ImportNode(xmlDigitalSignature, true));
I added a simple test file (test.xml) to the application and I am loading it into the XmlDocument object. For more details on this process, check the MSDN article.
You now have to save the XML file to a valid location, or, as I did, output it back to the user recklessly:
// just for us, let's output the document
using (var stringWriter = new StringWriter())
{
    using (var xmlTextWriter = XmlWriter.Create(stringWriter))
    {
        xmlDoc.WriteTo(xmlTextWriter);
        xmlTextWriter.Flush();
        return Content(stringWriter.GetStringBuilder().ToString());
    }
}
That should do it. Hope it helps.