Interacting with Dataverse data from Azure & C#


In this blog post, we'll cover an interesting topic that came up as part of my contributions to the Microsoft Disaster Response (MSDR) effort. With the Ukraine war, one of the biggest challenges for the rest of the world is displaced people. The Microsoft MSDR contribution provided some options in handling that. While that could, née should, be a blog post in itself, I'm focusing this one on interesting architectural patterns that surfaced. It's something that is applicable to multiple scenarios and I genuinely feel like it's useful to have in one's toolkit of tricks.
So, what are we going to be doing? Well, imagine a scenario where we are running an NGO that's helping at a natural disaster site. We have a group of people coming into a tent. When they reach the tent, a professional does an evaluation. But, to speed things up, you want to give the people a chance to announce their arrival - i.e., register. When they then show up, and see the person in the tent, their data is already available.
We want to expose this app to everyone, which means we can't use Power Apps for this as the licencing becomes prohibitively expensive at a certain scale. The same is true for Power Pages. But, there is a way...
Power Apps & Dataverse
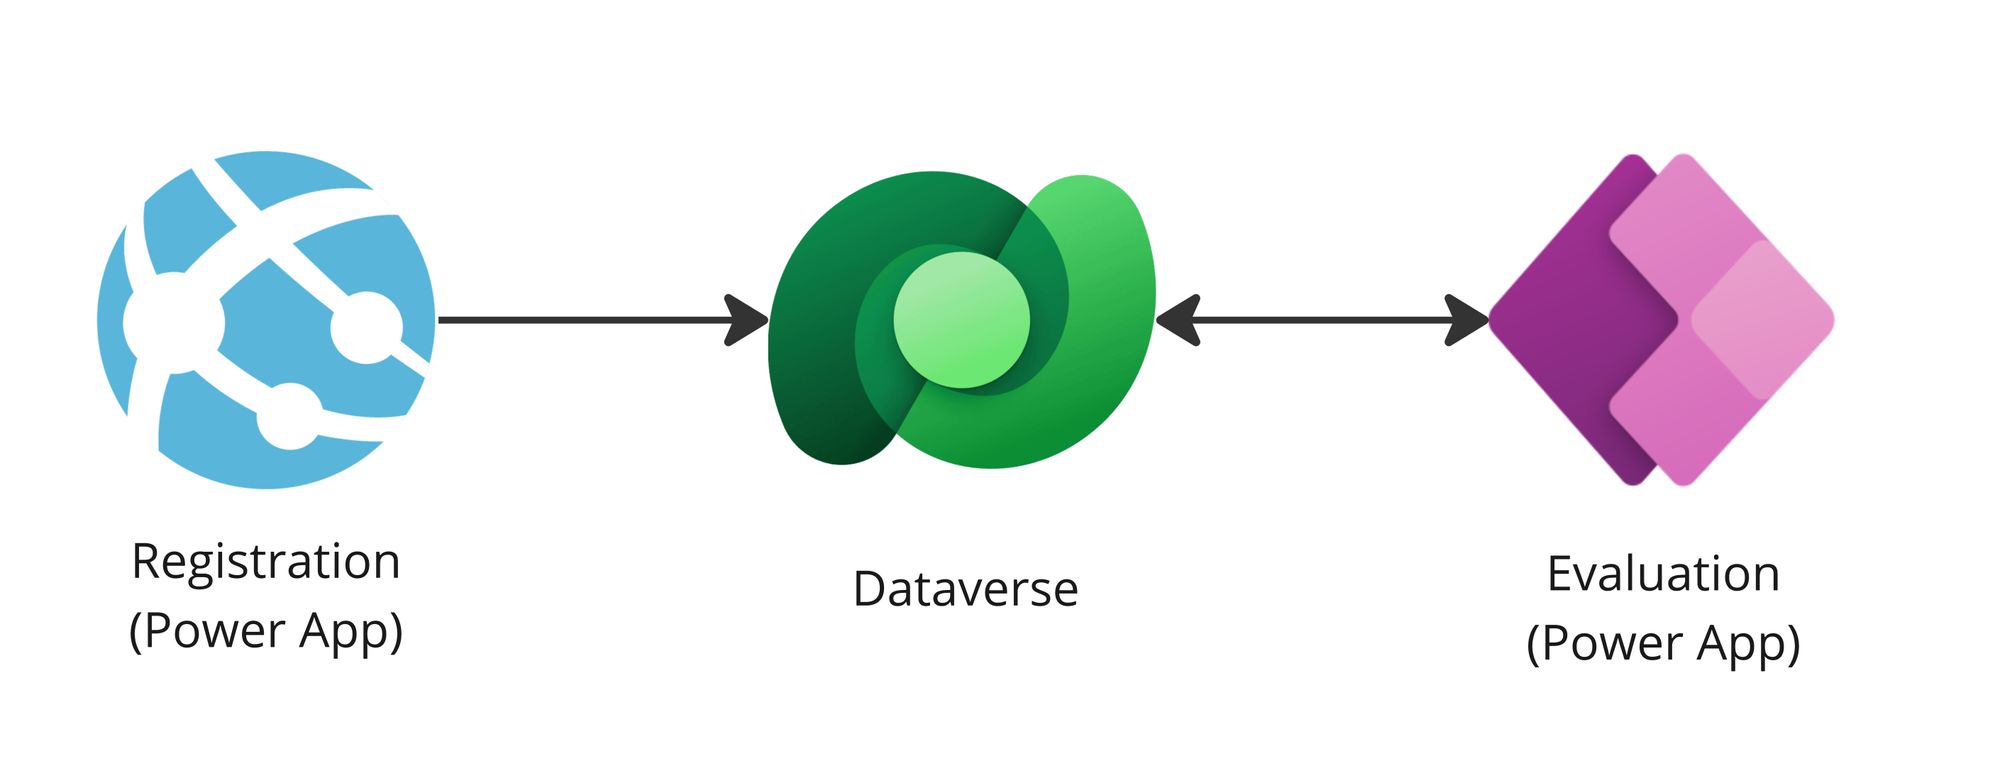
Without going too far in-depth into the solution we developed with MSDR, one relevant architectural detail is that we had an Evaluation app, which is a Power App (specifically a Model Driven app), and a Registration app, which is a simple Azure Web App.
Reading almost any example that includes Microsoft's view on "low-code" development, sooner or later, you will hear talk of a product called Dataverse. In most development scenarios, we have the ability to spin up a database. Either we spin up an instance ourselves, or we spin up a managed option (i.e. Azure SQL). But if we're managing the services ourselves, it also means taking care of back-up, security, scalability, etc.
Well, in a low-code world you don't have that option. So you need another way of storing data. While clouds like Azure, AWS, etc., provide several options for data storage, some require a bit more knowledge than others. For example, you could use Cosmos DB and interact through the API directly - but that sort of takes away the low-code attribute. So, Microsoft did the logical thing: built a new data layer. This layer is called the Dataverse.
It's basically a layer where Power Apps should store data. It's highly customizable and probably another great blogging opportunity to just talk about the features and capabilities it offers. But, for our example, suffice it to say, it's most useful as the link between the two applications.
We know that Power apps can read from it by default, so spinning up a simple new Power App is easy. But now, we need to figure out how to write the Azure side.
Step 0: Prerequisites
- An AAD tenant (i.e., an Organization account)
- An Azure subscription (a trial will do)
- Licences to create Power Apps
Step 1: Create and Register the Managed Identity
To authenticate our Azure backend towards the Dataverse, we will be using a concept called Managed Identities. A managed identity allows your app to access other Azure AD-protected resources - like Dataverse in our example. The identity is managed by the Azure platform and does not require you to provision or rotate any secrets. For more about managed identities in Azure AD, see Managed identities for Azure resources.
There are other ways of potentially authenticating (i.e., using App Keys & Secrets), but from an admin and security perspective, managed identities are one of the best. They take away most concerns around key rotations, there isn't a secret to loose, or inadvertedly check into source control... It's a pretty elegant way, basically.
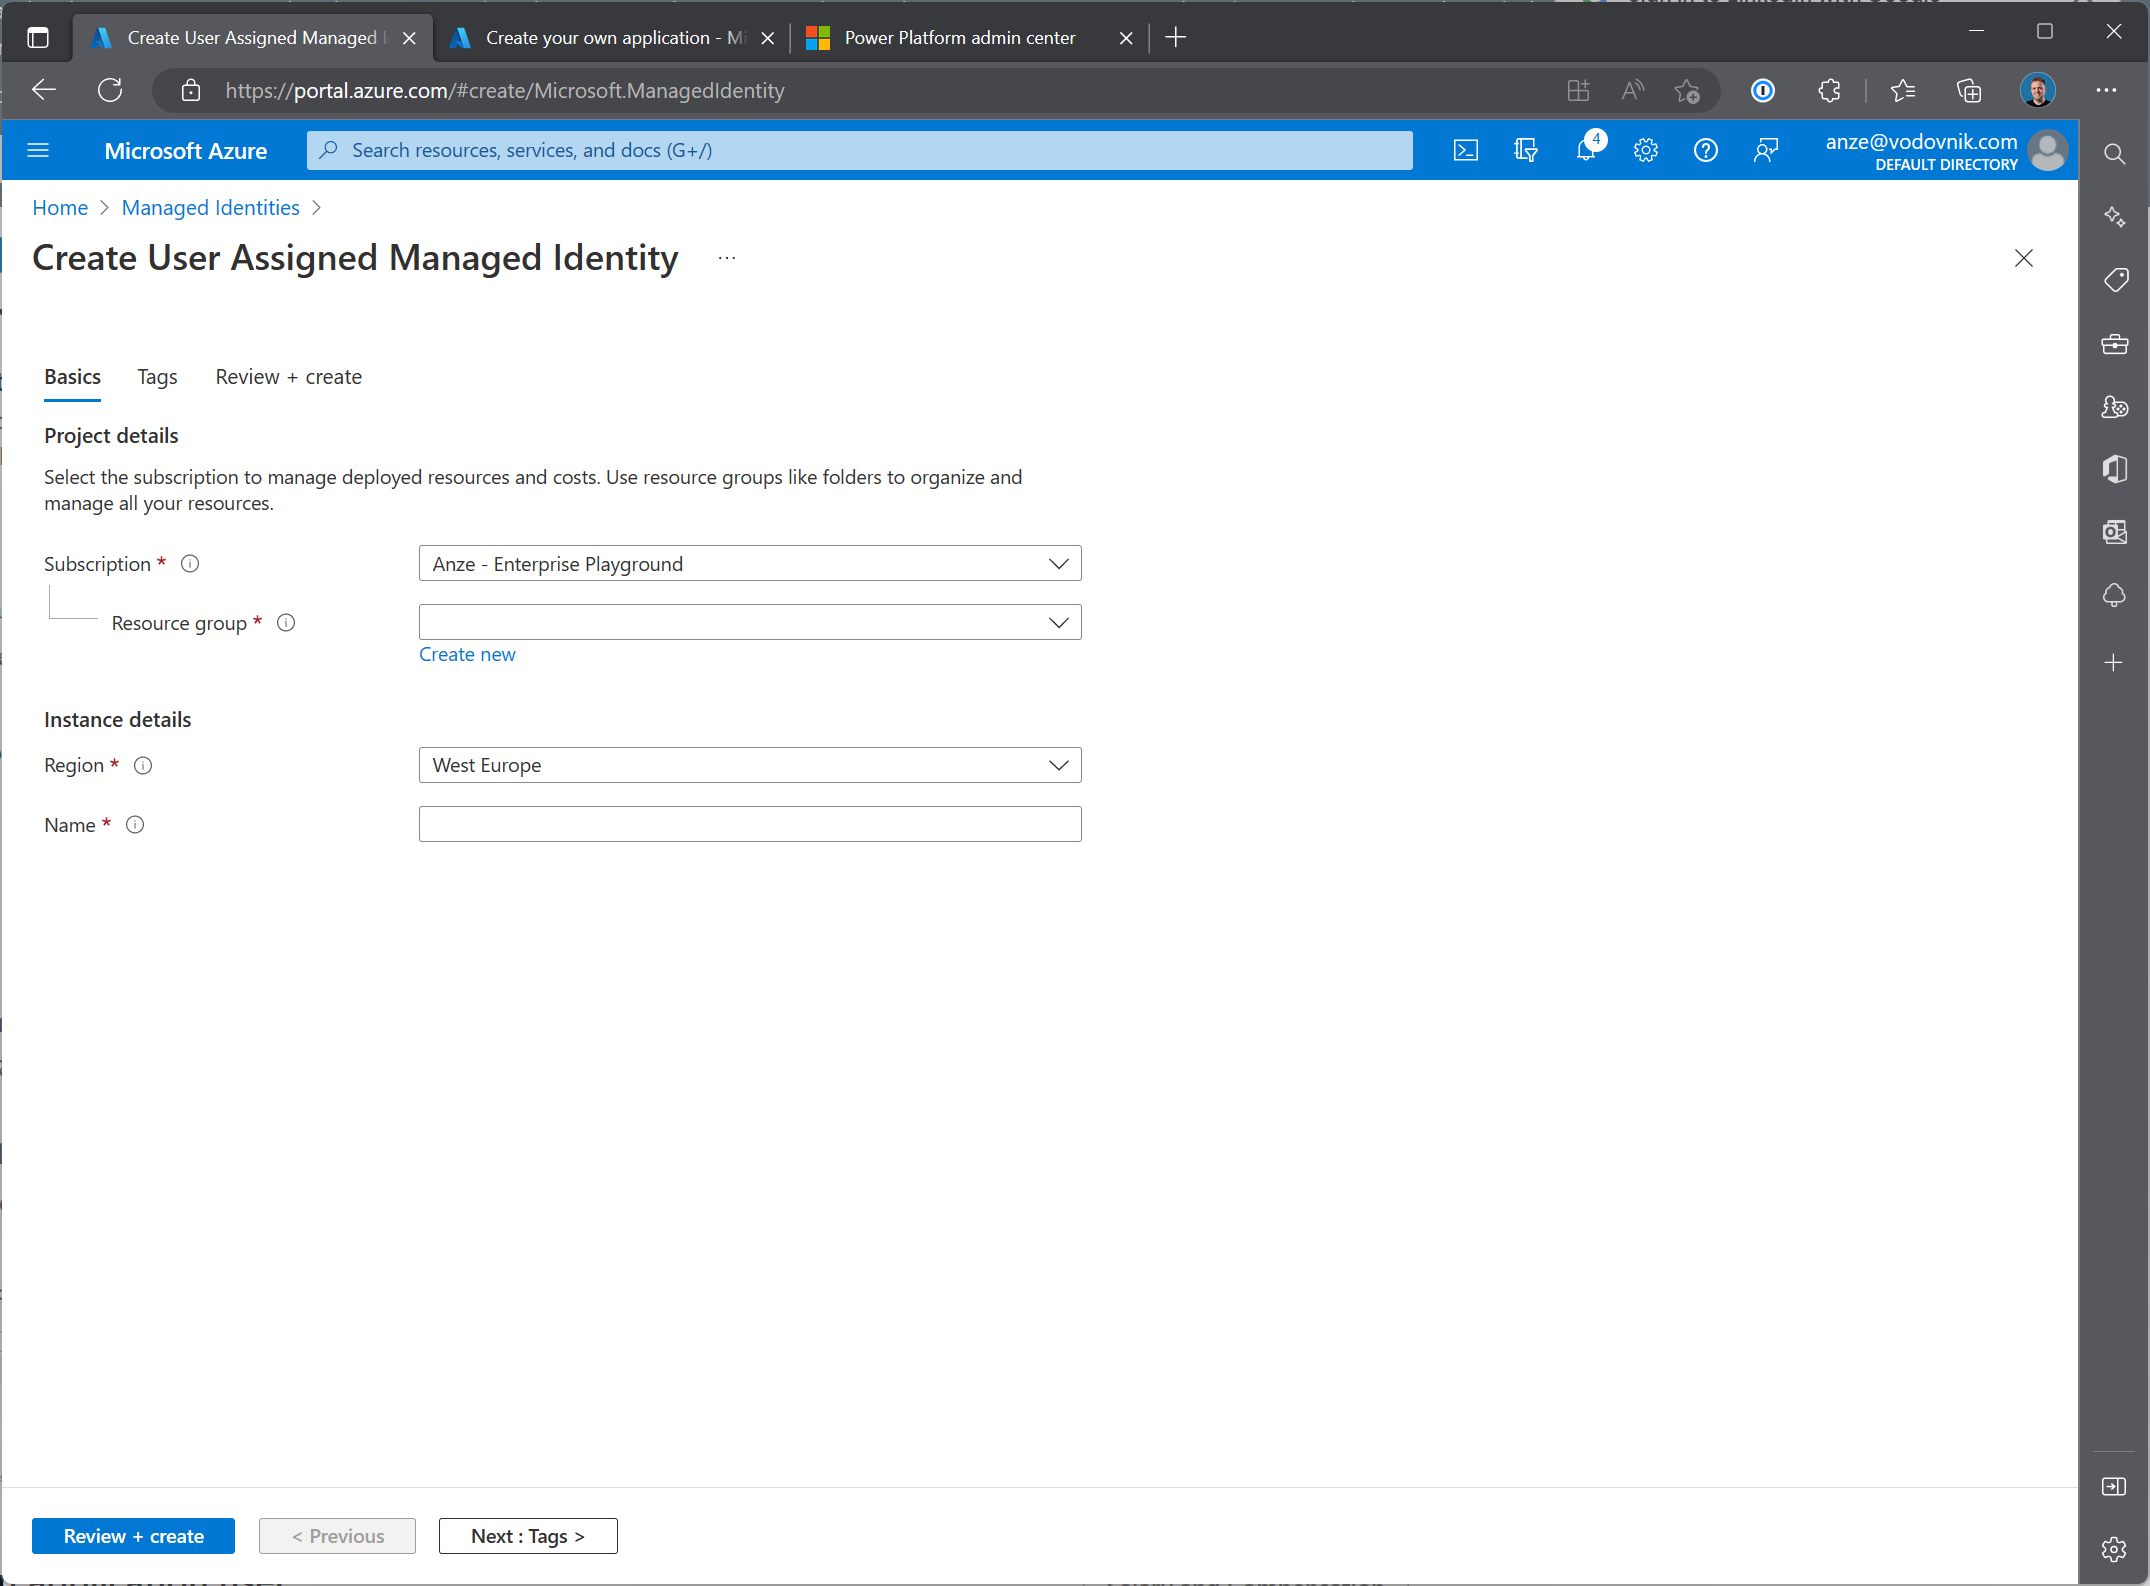
Open the Azure portal and navigate to Managed Identities (I hit G+/ and type Managed identities) and then hit the Create button. For this example, I just added the identitiy to the same resource group and used my existing naming convention.
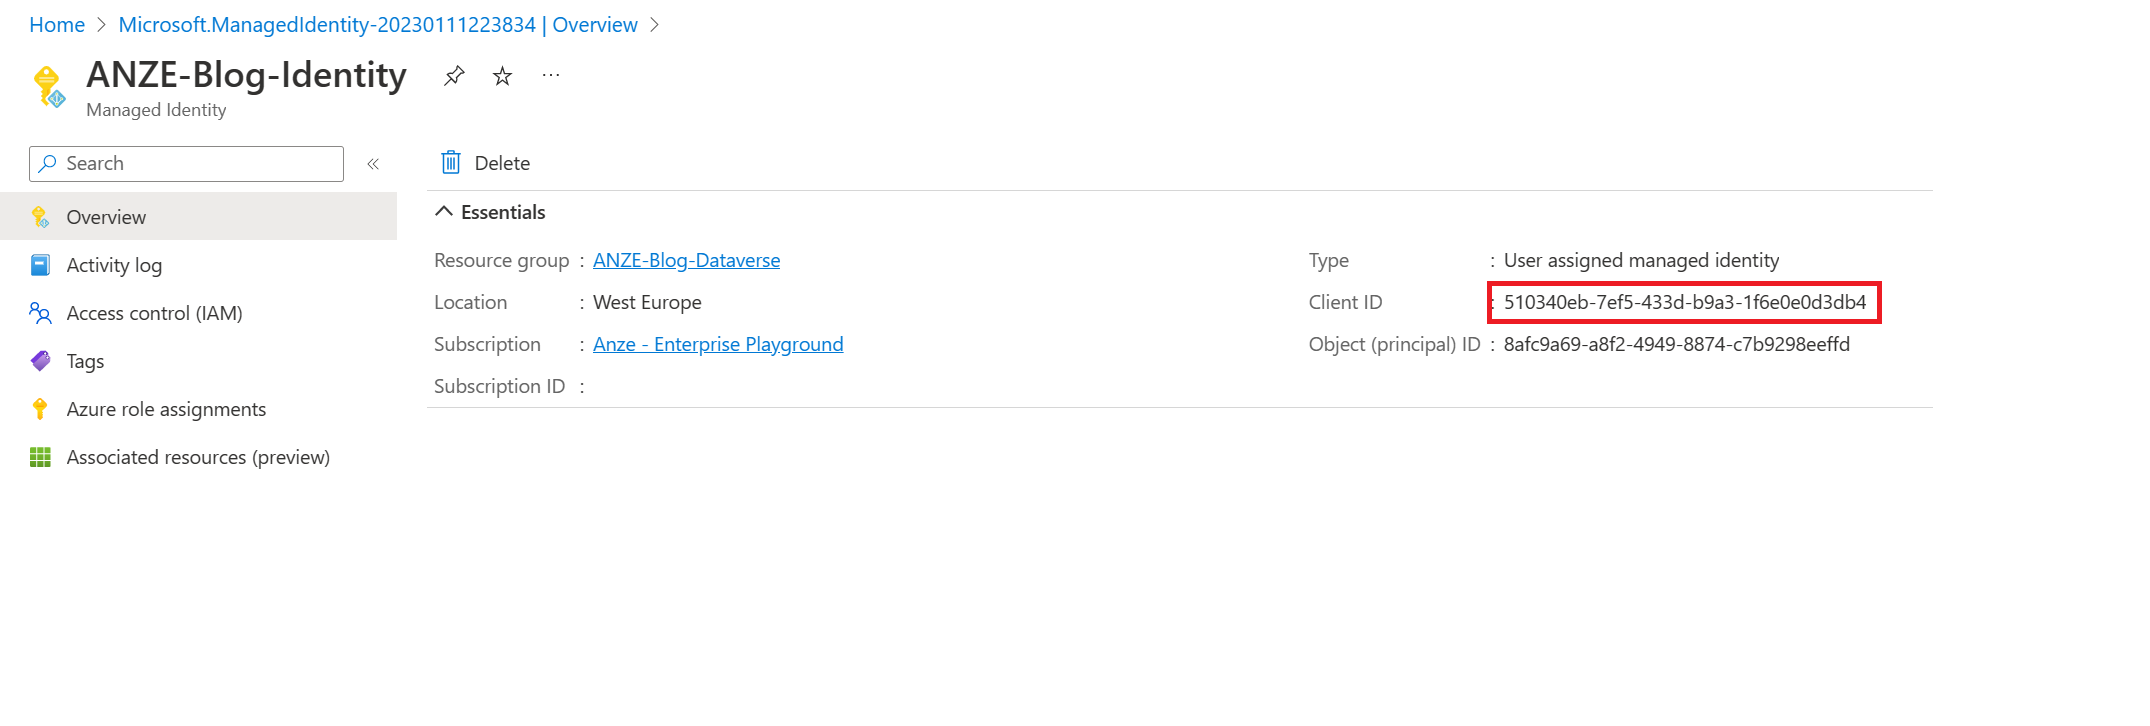
When created, go to the resource and copy the Client ID:
Next, we have to go to the Power Platform Admin Center. Navigate to your environment (i.e., through the Environments tab) then hit Settings, expand Users + Permissions and click on Application Users. Click on + New App User, then Add an app and paste the ID you've copied in the earlier step. The new identity should show up in the list.
Note: this caught me off guard a bunch of times before, but you have to be careful you are doing this in the same tenant! If it's not showing up, double check.
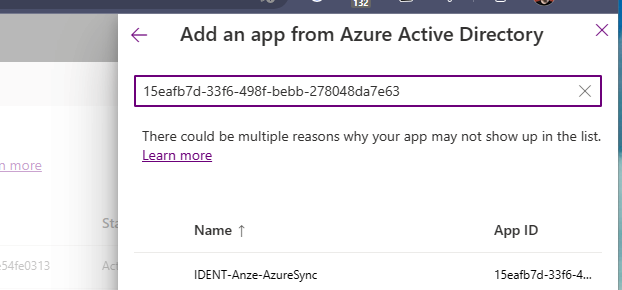
Client Id to search for the identity.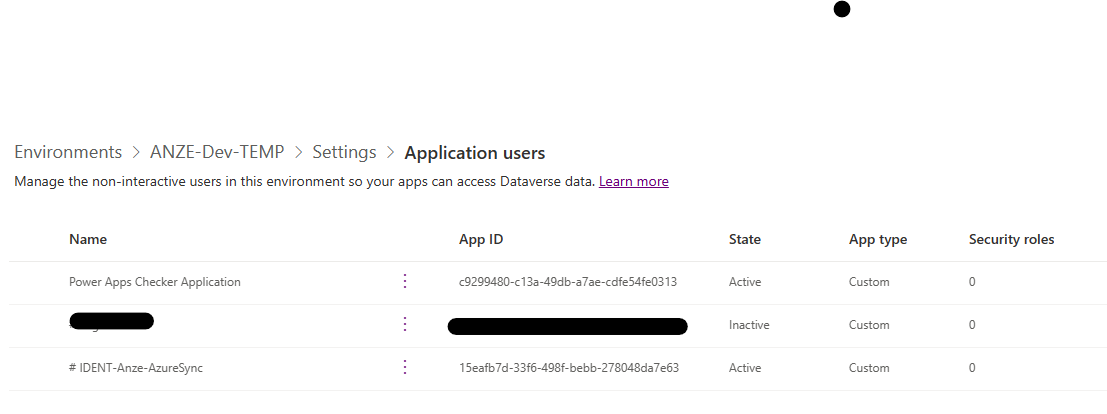
We still have to assign the managed identity to the actual application, but we'll get to that in a second. First, we'll need a few more pieces of information. While in the Power Platform Admin Center (aka.ms/ppac), navigate to the Environment's details and hit the link See all in the top right corner of the Details pane. That opens up more details. Note the Environment URL:

Step 2: Evaluation App
In order to keep this blog post on topic, we'll keep this application simple. But, as an exercise, I wanted to create it non the less.
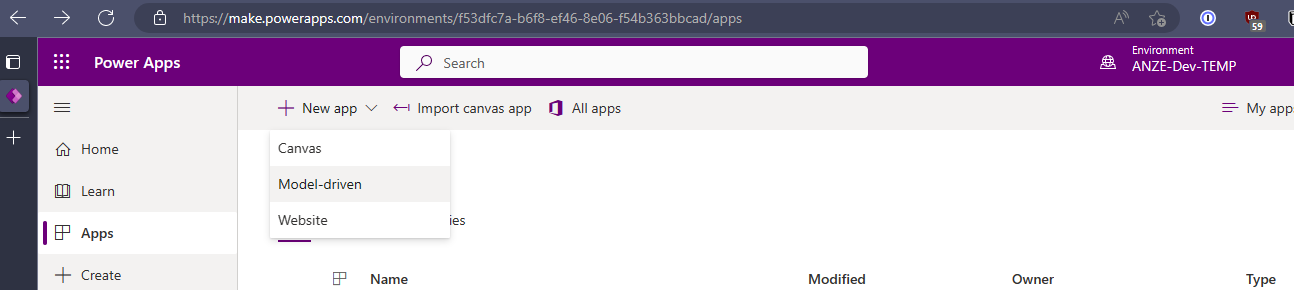
First, we go to the Make portal - yes, I know, this is now the 3rd portal we've used in this blog post. Then, we find the correct Environment, open Apps and hit + New app and select Model-driven:
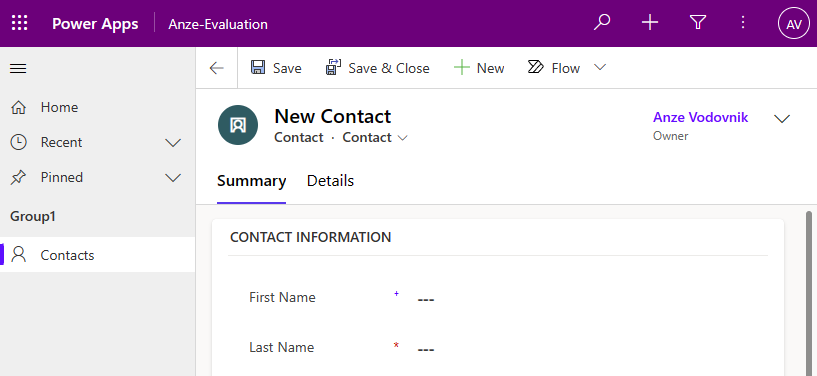
We then + Add page, select Dataverse table, and find Contact in the list of existing tables. If you now hit Play in the top right, you can already add and interact with data:
To keep it simple, let's just assume we want to also capture one more thing about the person registering - their food preference. As a person with a food allergy, this is a beloved topic of exploration...
If we want to add this information, we need to go back to our Make portal and expand Dataverse > Tables then find the Contact table. This is where Dataverse as a "storage" solution is starting to seem much more familiar. In the top bar, let's click + New > Column and add a Food Preferences column.
This will generate a column in the schema, and we need to get the name to use in code later. There are multiple ways to do it, one of which is to open the Columns link under the Schema pane, then search for FoodPreference in the upper right corner. Then, hit the elipsis (three dots) on the field, and go to Advanced > Tools > Copy logical name.

We'll come back to where that's used. Now, we can add this field to our app so it's displayed when we open the contact.
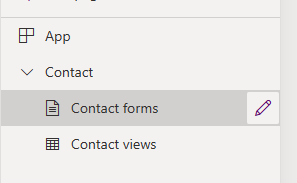
In the Make portal, we can open up the app again by clicking Edit, and expanding the hiearchy structure, we should see App > Contact > Contact forms. Hit the edit button next to it, and we can customize the fields we see on the form itself.
In the new list, search for Food Preferences again, then you can drag & drop the field to wherever you want to see it.
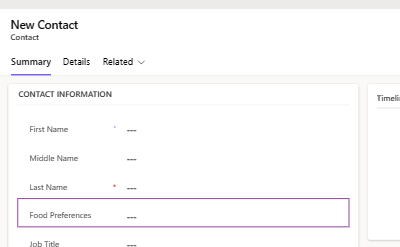
Remember to hit Save when you are done.
Step 3: Registration app
Next, we can turn our attention to the Web App. For the purpose of this blog post, I'm skipping the boring parts and assuming we have a web app (but I've used a new MVC app when creating it, and am using Bootstrap for styling).
Skipping through the details of the Controller itself, the key code is this:
using Microsoft.PowerPlatform.Dataverse.Client;
using Microsoft.Crm.Sdk.Messages;
using Azure.Identity;
using Azure.Core;
using Microsoft.Xrm.Sdk.Messages;
using Microsoft.Xrm.Sdk;

var tokenCredential = new DefaultAzureCredential();
// note: this may not be ideal for prod, but it's great for testing

var serviceClient = new ServiceClient(ConfigService.DataverseURI, async (string dataverseUri) =>
{
    dataverseUri = new Uri(dataverseUri).GetComponents(UriComponents.SchemeAndServer, UriFormat.UriEscaped);
    return (await TokenCredential.GetTokenAsync(new TokenRequestContext(new[] { dataverseUri }), default)).Token;
}, true);
if (!serviceClient.IsReady) throw new Exception("Authentication Failed!");

var registration = new Entity("contact");
registration["FirstName"] = model.FirstName;
registration["LastName"] = model.LastName;
registration["cr90c_foodpreference"] = model.FoodPreference;

var req = new CreateRequest() { Target = registration };
serviceClient.Execute(req);
Some of the key aspects of the code here are:
- We're using
DefaultAzureCredentialwhich lets us run this locally too. It means that when we run it, it'll pick up the credentials in the following order : EnvironmentCredential, ManagedIdentityCredential, SharedTokenCacheCredential, VisualStudioCredential, VisualStudioCodeCredential, AzureCliCredential, AzurePowerShellCredential, InteractiveBrowserCredential - To actually create the entity, we're using
CreateRequest. In a production setting, this would look very different of course, and we'd want to get rid of magic strings, etc., etc. but for the sample we're preparing, this is fine! - We've installed
Azure.IdentityandMicrosoft.PowerPlatform.Dataverse.Client.DynamicsNuGet packages to help us with the connectivity.
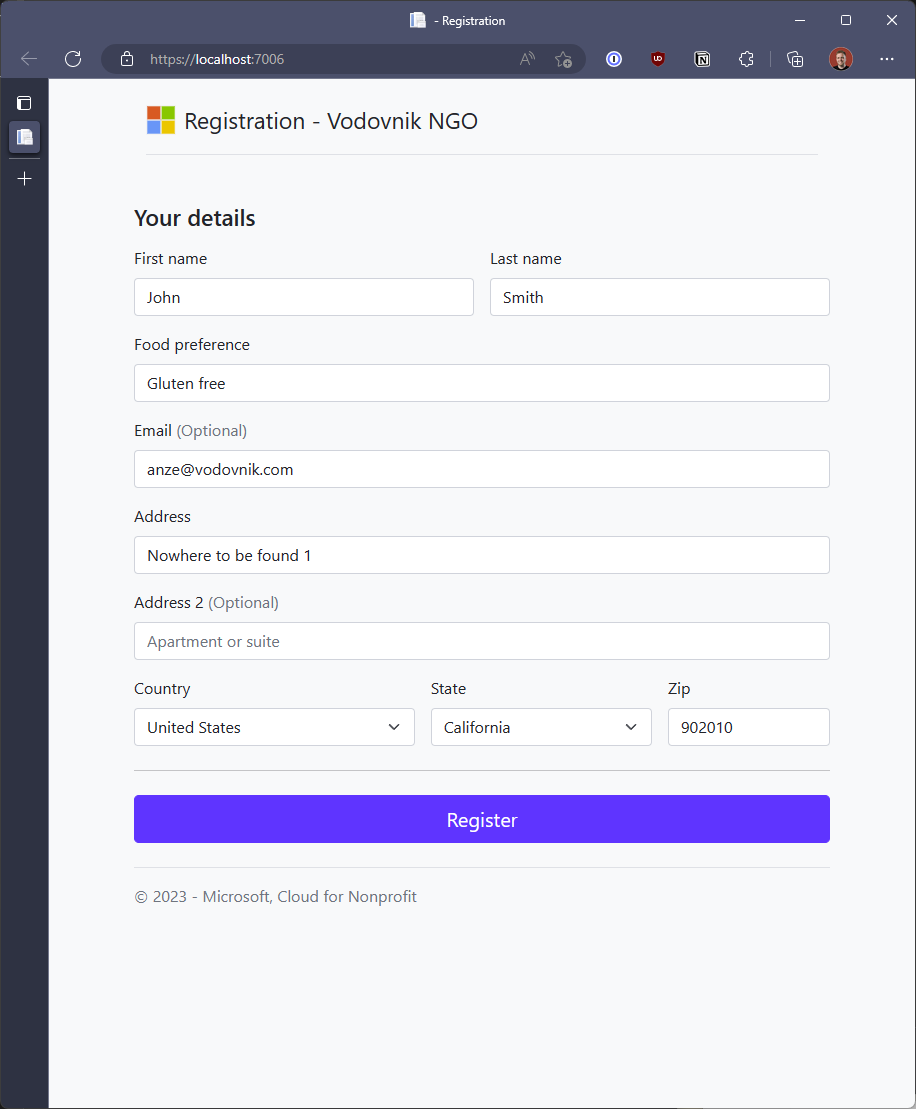
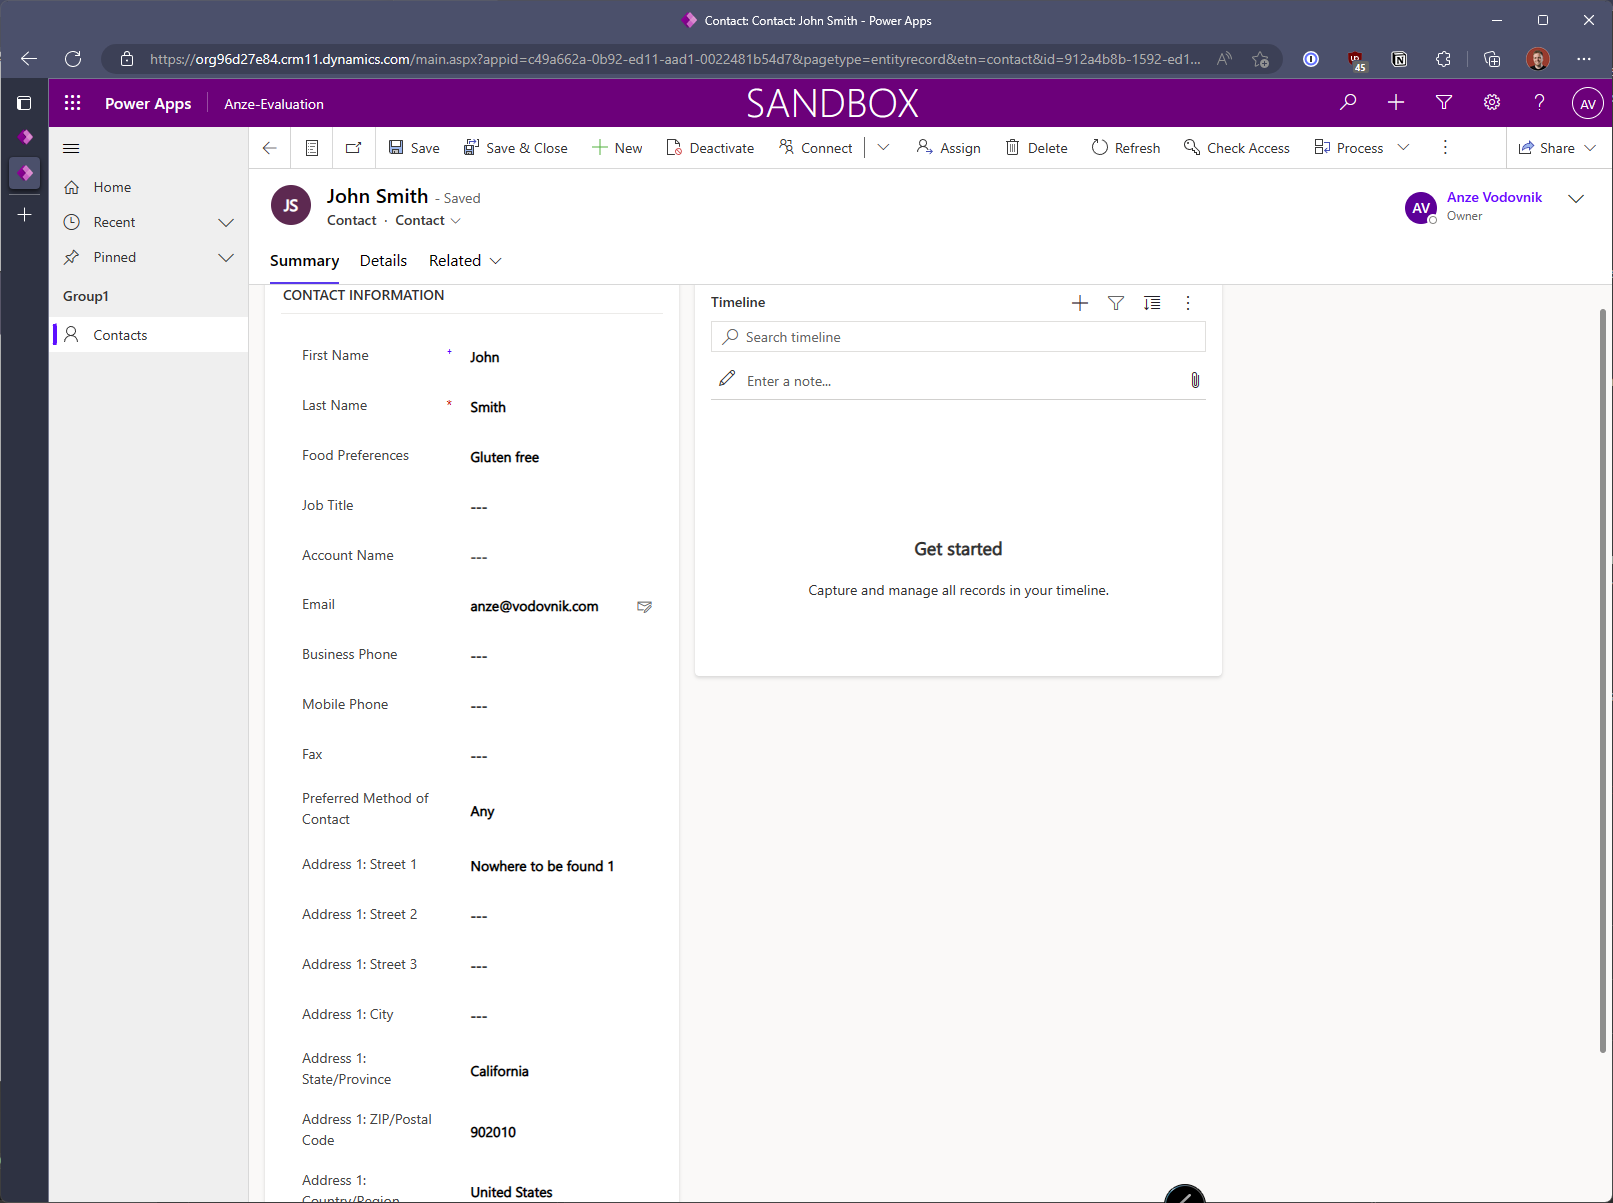
When we hit Register here, we can expect to see some data in the Dataverse and therefore visible in our Evaluation app:
Step 4: Deploying to Azure
Now we know the app works, and the only thing left to do is to deploy it to Azure & wire up the remaining pieces (i.e., Managed Identity). In production environments, I'd want to make sure this is automated and ran through pipelines - but for the sample, I am using the much hated "Right click deploy" method.
To clarify, I say "much hated" but the only reason that is so is what I've said before. If you're doing that for production, you need to have a read about Continuous Integration & Deployment (CI/CD). As a note, I'm planning a Part III of my seris on building products at scale, where I'll cover that part too. But until then, there's plenty information available. You can start here.
Anyway, after the application is published to the Azure subscription, all that's left to do is to open the Identity tab in the left hand side of the resource in Azure Portal.
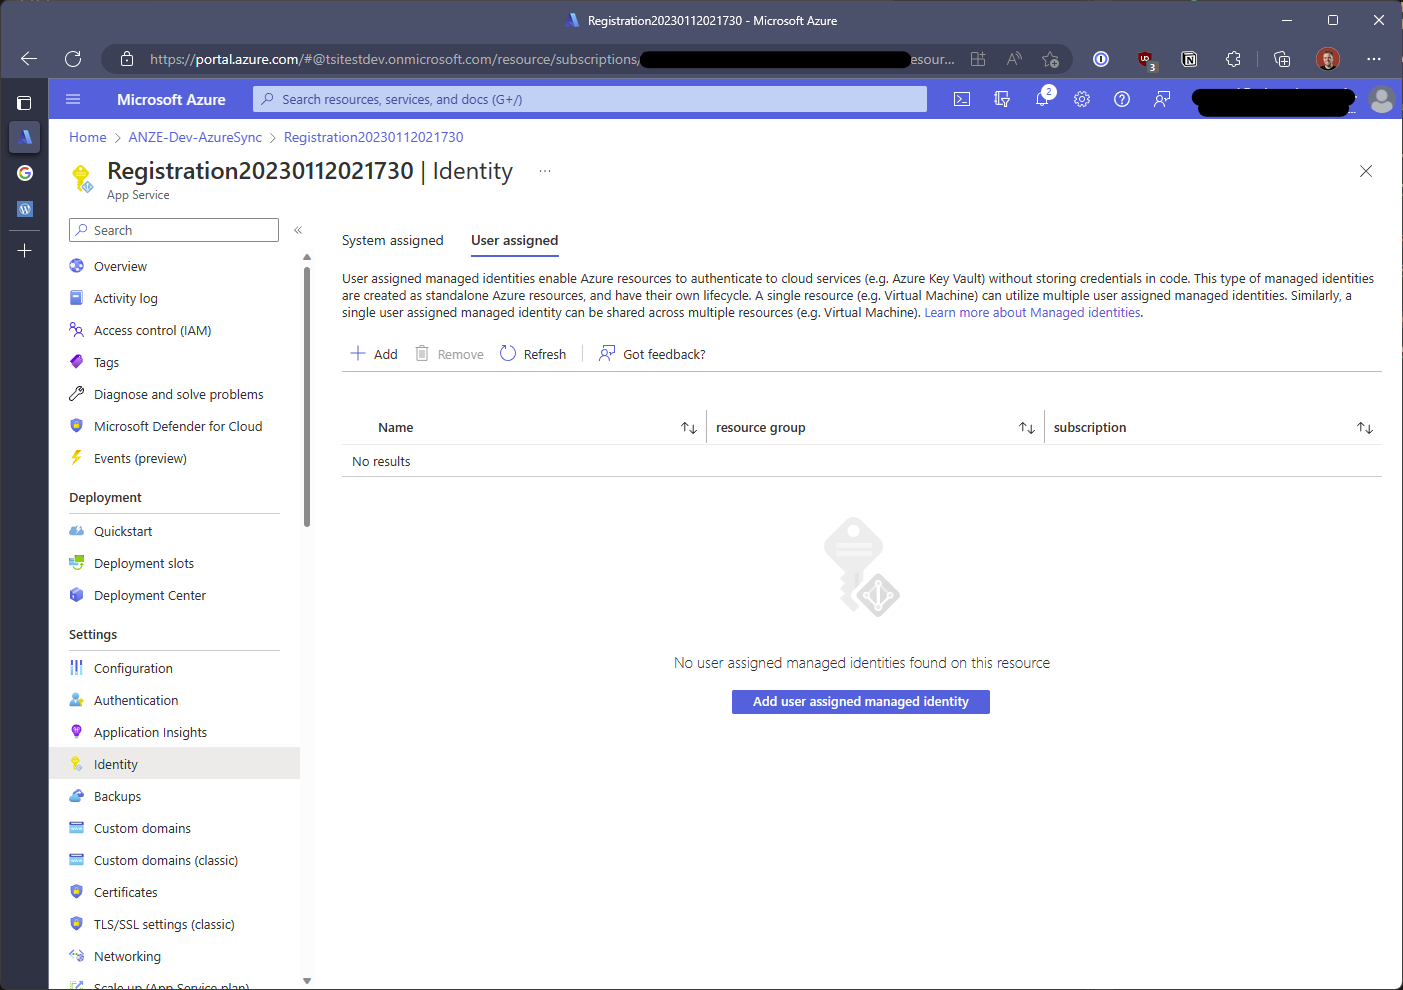
Now, we click the Add user assigned managed identity and find the one we've created in step 1 of this process. I'm using IDENT-Anze-AzureSync. You also need to open Configuration and add an Application Setting called AZURE_CLIENT_ID. The value should be the Client Id that we copied in Step 1. This is how the application knows which managed identity to actually use underneath - note, you can avoid this by not using the DefaultAzureCredential entity and do the right thing by using ManagedIdentityCredential.
Once done, we can visit the app's URL and repeat the registration "flow".
So, there we have it! A simple way to interact with Dataverse from PowerApps and C# apps.
Why would we use this?
As pointed out in the beginning, in some cases, you want to have additonal flexibility in how you handle the data. Maybe you want to enable data entry for a large scale of people - and trying to manage cost of doing this. There are obviously other scenarios that are possible, but regardless, the approach above remains the same.


